Wappler's full potential is realised when we begin using Dynamic Data, Events, and Attributes.
For this tutorial we have a form, where users enter their details. We'd like to apply dynamic attributes to some of the inputs here.
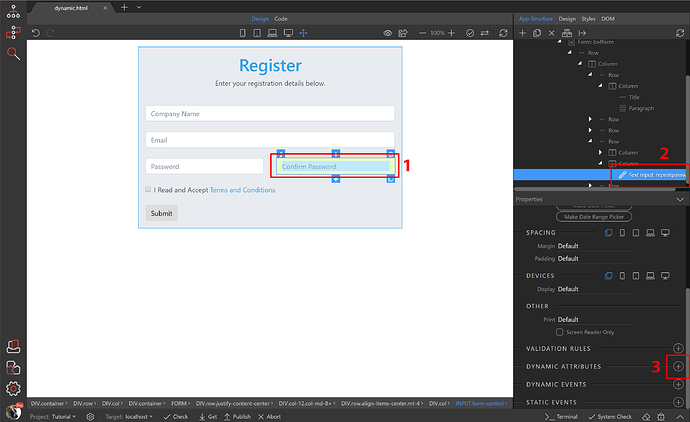
Step 1: Starting with the “repeat password” form field. We’d like it to be disabled when there is nothing entered in the password field. Click the “repeat password” form field on your page(1) or select it in the app connect panel(2) and click the “add dynamic attribute” button(3).
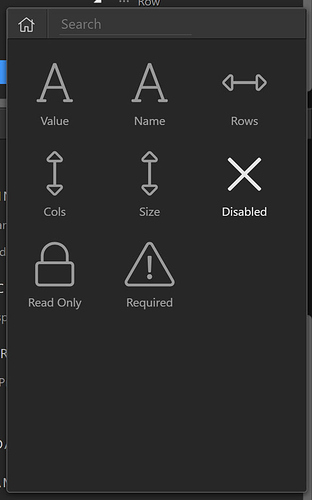
Step 2: Select the input category(1) as we’d like to change the attributes of an input field. The smart app connect panel only shows the attributes that are available for the selected element. Then, select disabled(2).
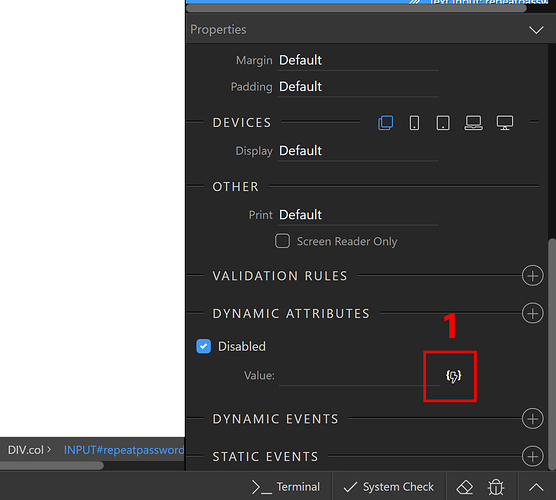
Step 3: The disabled attribute has been added to the “password repeat” form field, but it doesn’t do anything yet. Now, we need to select the condition, when it should be applied. Click the dynamic data button(1), in order to select the condition.
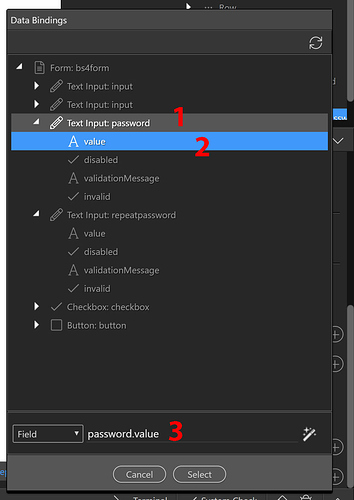
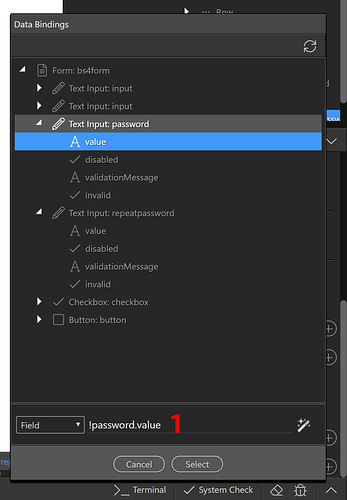
Step 4: We need this “repeat password” form field to be disabled when the first “password” form field has no data input. From the Data Bindings panel expand the “password” input field attributes(1). Select the “password” input field “value”(2).
By clicking on the “password” input field’s “value”, it automatically inserts an expression below.(3) In this case, the expression Wappler inserted means that the disabled attribute will be applied to the “repeat password” input field when the first “password” input field has a value set. That’s not what we want, so we’ll fix that.
Step 4b: To fix it, all we need is to add an exclamation mark in front of the expression(1). In a way, the exclamation point means: NOT when there is a value set in the first “password” input field. Click the select button when you are done editing the expression to close this panel.
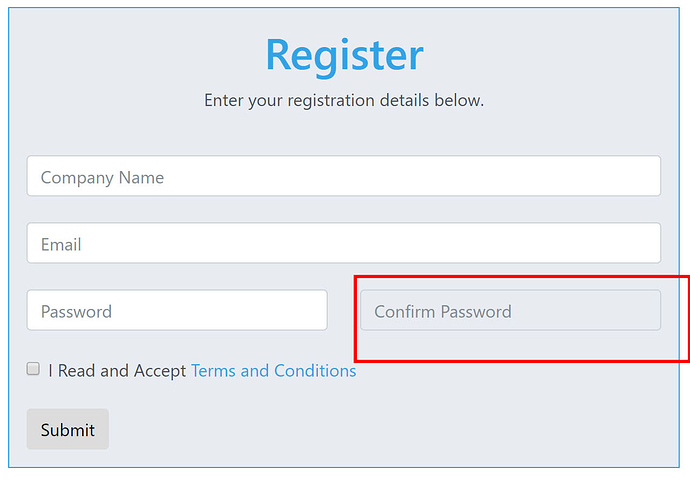
Demonstration: You can see the changes immediately in live design view. The “password repeat” input field is now disabled because there is nothing entered in the first “password” input field.
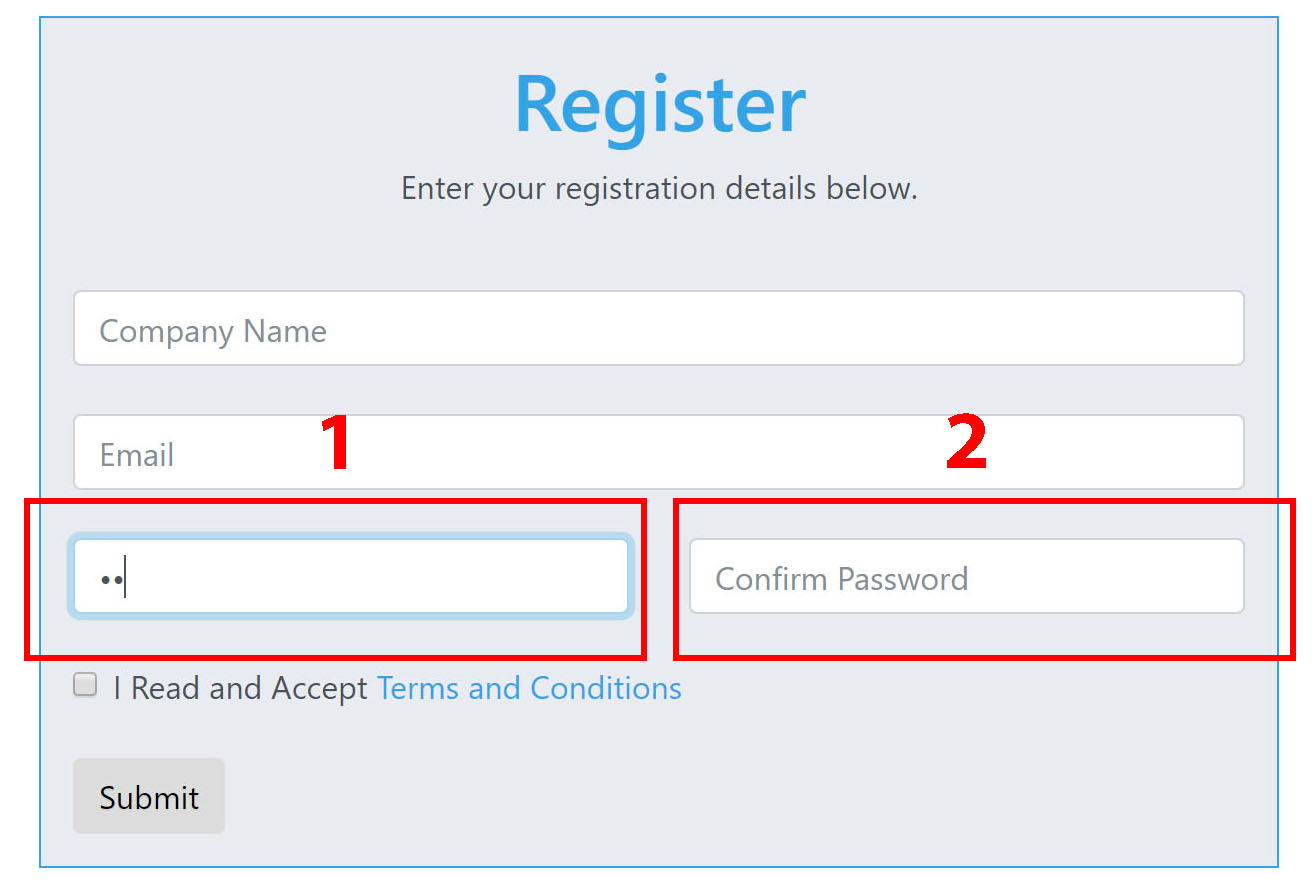
As soon as we enter something in the first “password” field(1) the disabled attribute will be removed. And now you can use the confirm your password input(2).
Last updated:
