A. Introduction
This is where the fun starts. If you have not read the Introduction to this Tutorial, please do so now so that you can be acquainted with Sessions and Arrays. Continuing with our template…
B. Create the Session Storage
-
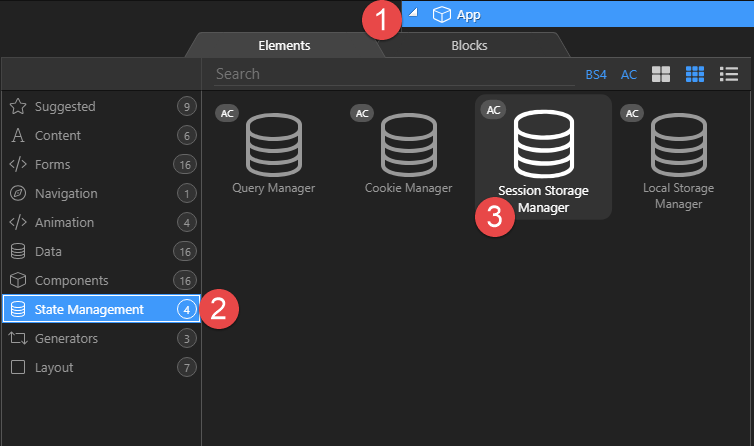
To add a Session, right click App (1), select State Management (2) and click on Session Storage (3).
-
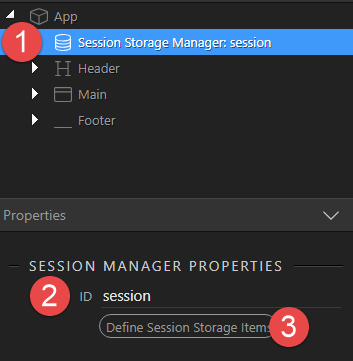
Select Session Storage (1), set the Session ID (2) and click Define Session Storage Items (3).
-
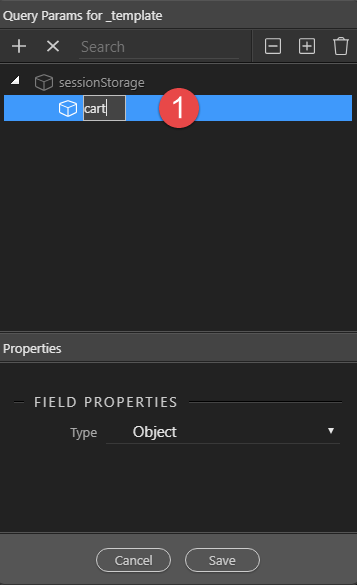
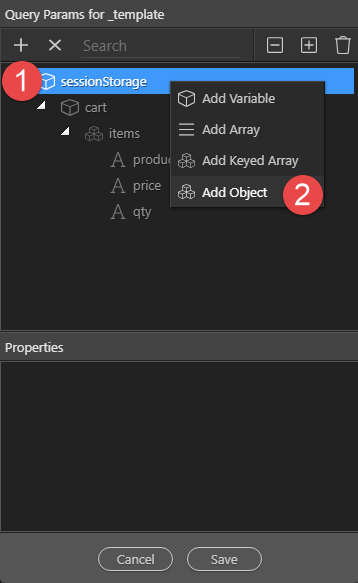
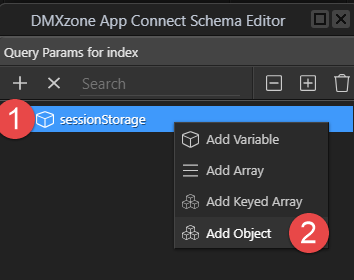
In the pop-up, right click sessionStorage (1) and click on Add Object (2)
-
Name the object
cart -
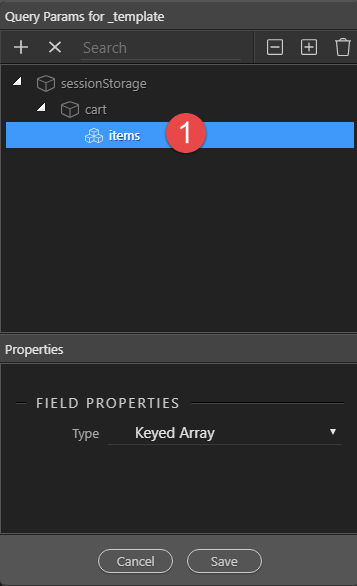
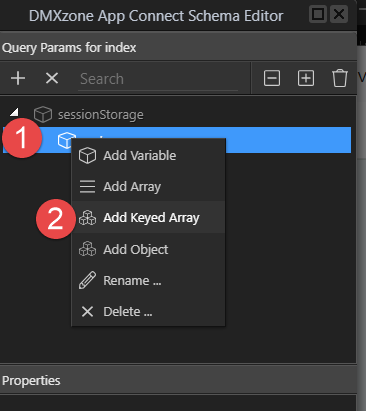
Create the cart items as a Keyed Array by right clicking cart (1) and clicking on Add Keyed Array (2)
-
Name the Keyed Array
items -
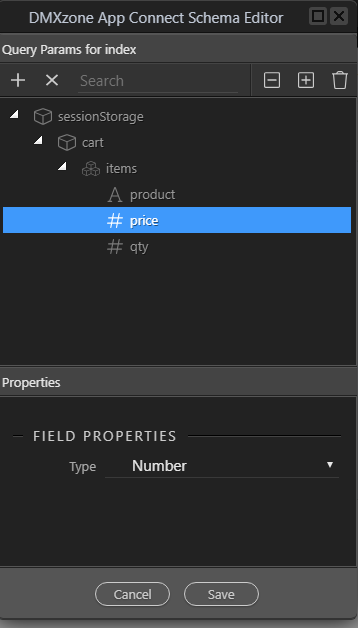
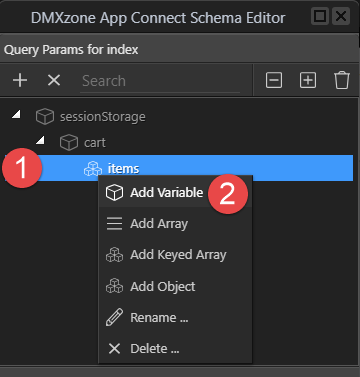
We now add our 3 variables for product name, price and quantity. Right click items (1) and select Add Variable (2) and give the variable the name of product. Repeat for price and qty ensuring that the last 2 will have a type of number.
-
This is the end result
-
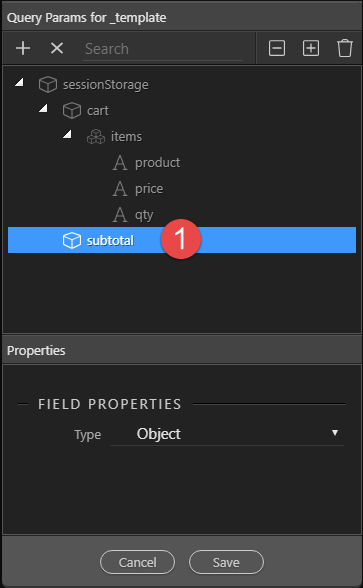
Right click sessionStorage (1) and click on Add Object (2). This will be our subtotal object.
-
And name it
subtotal(1) -
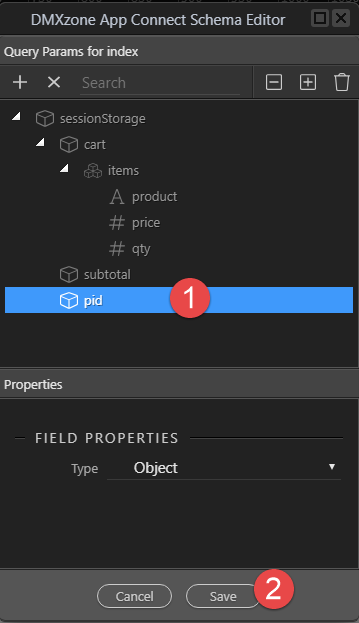
Create an object for Product ID’s (1) and save the parameters (2).
C. Create the Cart Array
-
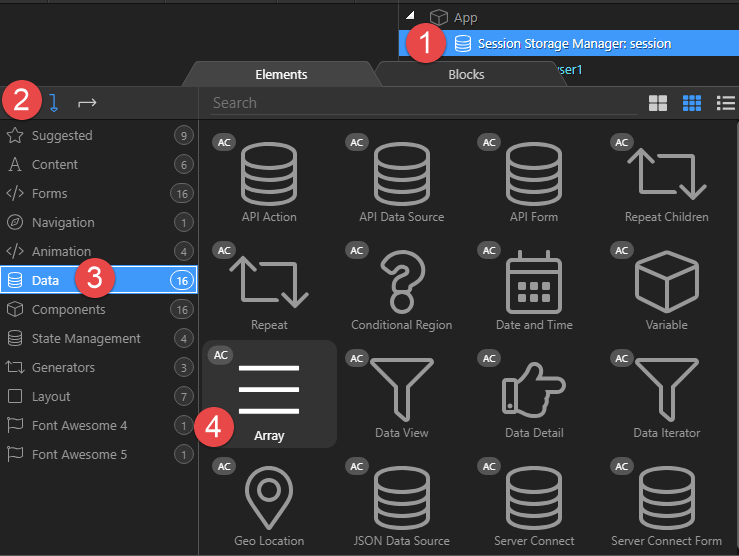
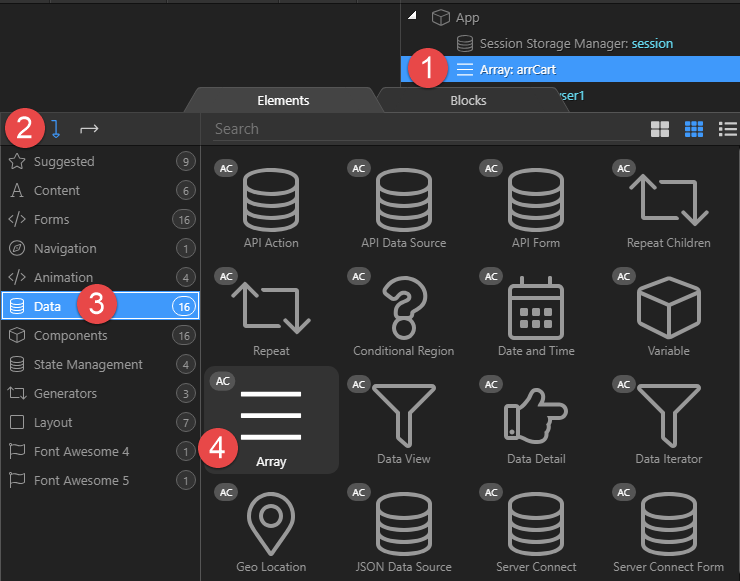
We will now add an array for our cart object. Right click Session Storage Manager (1), Add After (2), Data (3) and Array (4)
-
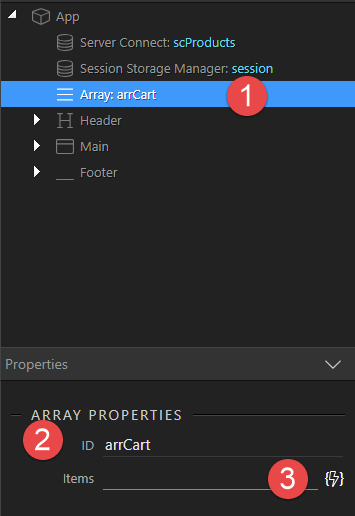
With Array selected (1), give the array an identifiable ID (2) and select the lightning bolt (3)
-
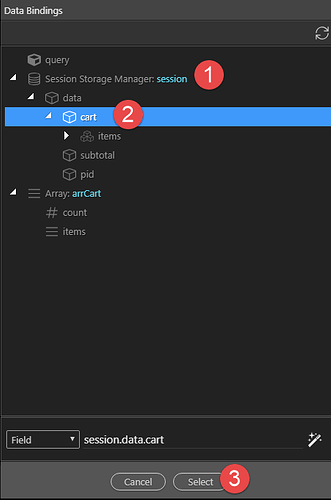
Under Session Storage Manager (1) select cart (2) and click on Select (3) to apply the binding
-
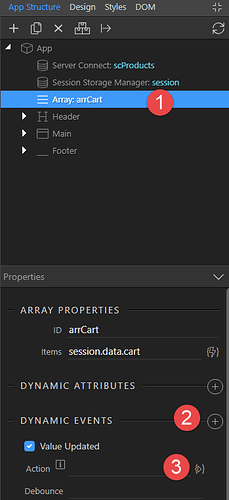
This is to update the Session when updating the Array. Make sure that Array (1) is selected, click on Dynamic Events (2) and Value Updated automatically appears. Click the Action button (3).
-
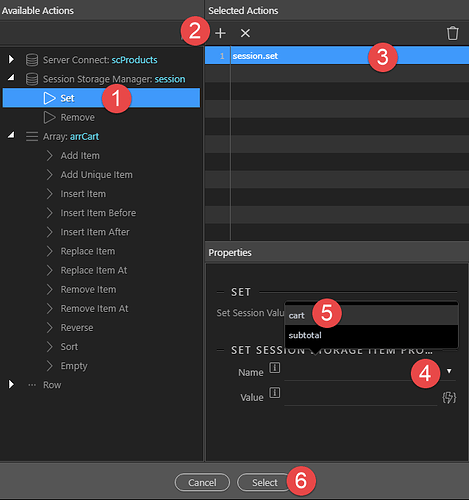
In the pop-up, select Sessions Storage Set (1), click the plus sign (2), select session.set (3), click on the Name selector (4) and select cart (5). You may need to do 4 and 5 twice!! because the first attempt does not work.
-
This is where I get tangled up. It’s most likely me. The way that I untangled myself was to go into Code view and change
<dmx-array id="arrCart" dmx-bind:items="session.data.cart" dmx-on:updated="session.set('cart',,{})"></dmx-array>
to
<dmx-array id="arrCart" dmx-bind:items="session.data.cart" dmx-on:updated="session.set('cart',items,{})"></dmx-array>
D. Create the Subtotal Array
-
We now add the Array for Subtotal by right clicking arrCart (1), Add After (2), Data (3) and Array (4).
-
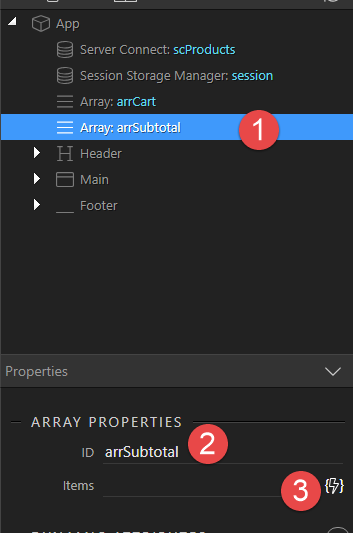
With Array still selected, give the array an ID (2) and select the lightning bolt (3)
-
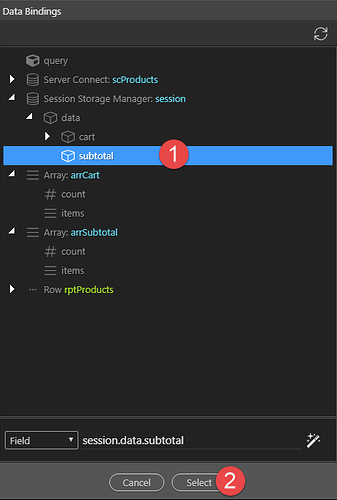
In the pop-up, choose subtotal (1) and Select (2) to apply the binding.
-
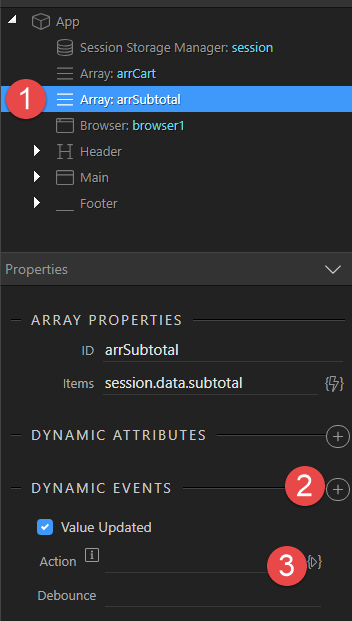
So that the Session is updated when the Array value changes, with the Array (1) still selected, we click on Dynamic Events (2) and Value Updated automatically appears. Click the Action button (3).
-
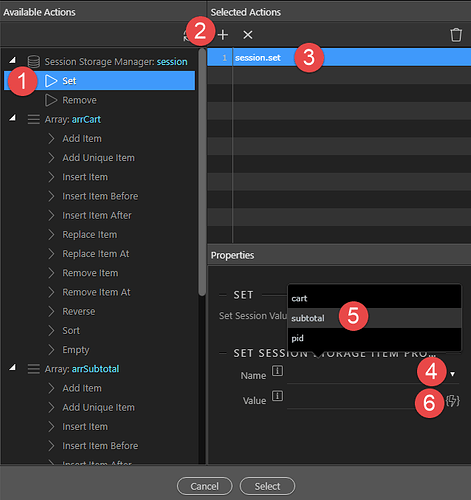
In the pop-up, select Sessions Storage Set (1), click the plus sign (2), select session.set (3), the name selector (4) and cart (5). You may need to do 4 and 5 twice!! because the first attempt does not work. Click the lightning bolt (6) to enter the value.
-
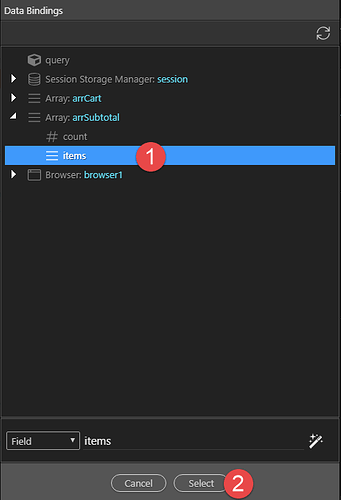
In the pop-up select items (1) under the Subtotal array and Select (2) to apply the binding.
-
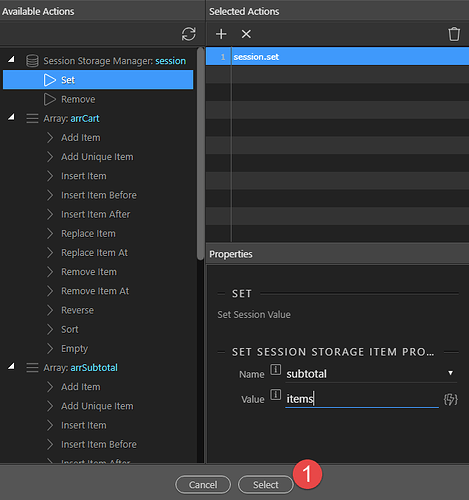
Click Select (1) to save the Action
E. Create an Array for the Product ID
-
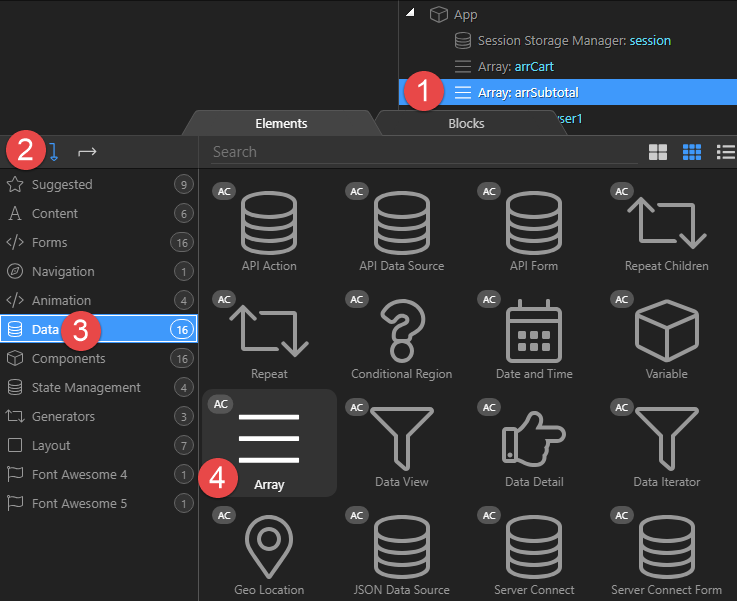
To add the Array for product ID, right click arrSubtotal (1), Add After (2), Data (3) and Array (4).
-
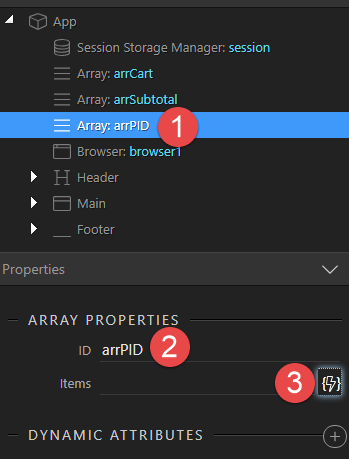
With the Array (1) still selected, give the array an ID (2) and select the lightning bolt (3)
-
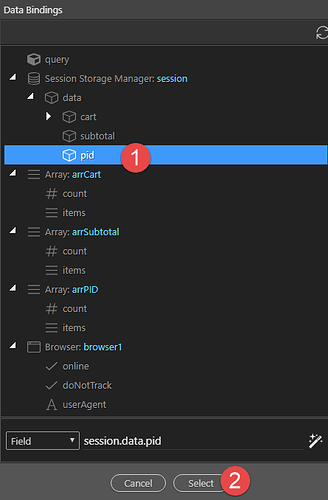
In the pop-up, choose pid (1) and Select (2) to apply the binding.
-
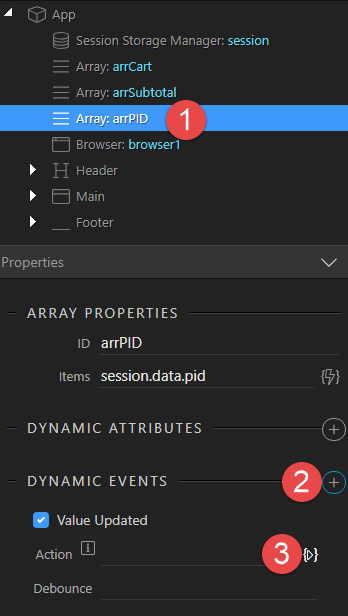
So that the Session is updated when the Array value changes, with the Array (1) still selected, we click on Dynamic Events (2) and Value Updated automatically appears. Click the Action button (3).
-
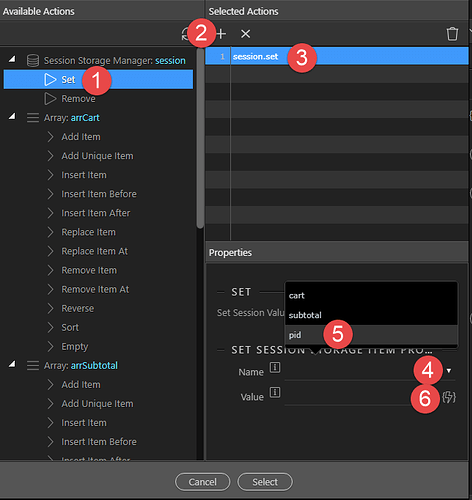
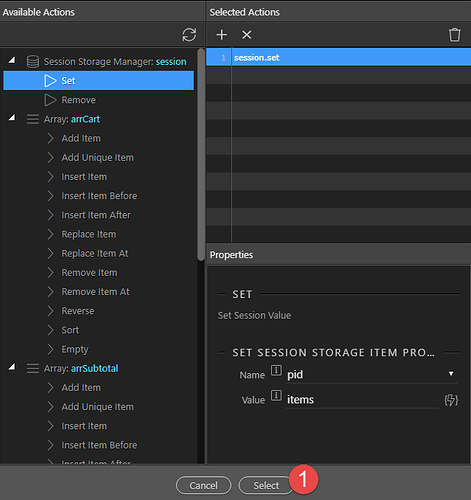
In the pop-up, select Sessions Storage Set (1), click the plus sign (2), the name selector (4) and pid (5). You will need to do 4 and 5 twice!! because the first attempt does not work. Click the lightning bolt (6) to enter the value.
-
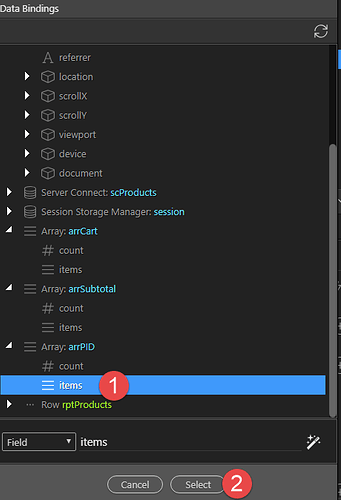
In the pop-up select items (1) under the PID array and click on Select (2) to apply the binding.
-
Click Select (1) to save the Action
Important Note:
I have found that Wappler is not very willing when creating the Arrays. Go into Code view and make sure that the arrays are similar to the following:
<dmx-array id="arrCart" dmx-bind:items="session.data.cart" dmx-on:updated="session.set('cart',items,{})"></dmx-array>
<dmx-array id="arrSubtotal" dmx-bind:items="session.data.subtotal" dmx-on:updated="session.set('subtotal',items,{})"></dmx-array>
<dmx-array id="arrPID" dmx-bind:items="session.data.pid" dmx-on:updated="session.set('pid',items,{})"></dmx-array>Last updated:
