We start with a very simple data table containing an primary key (imageid) and and image name (imagename)
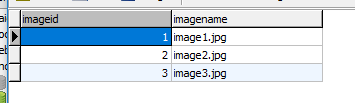
Each image is stored in a folder called “images1”
We wish to move these images into a new folder with each image in a unique folder based on their id triggered by a button click
for example, /images/1/images/2 etc
Firstly we create a simple bootstrap table using generator
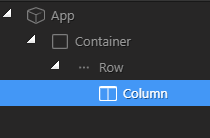
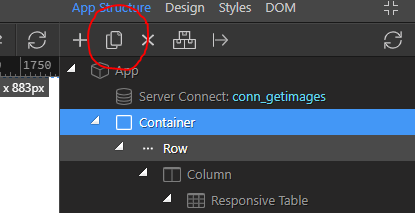
App connect and bootstrap have already been added to the page as has a container/row/column
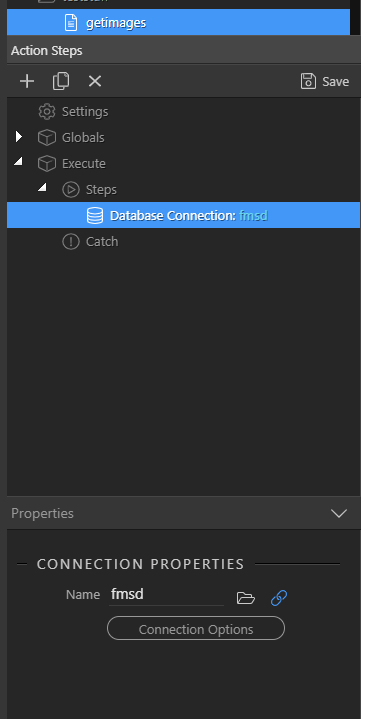
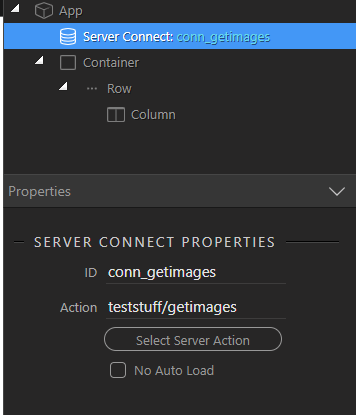
we create a server Action to retrieve the image data
Create a server connection
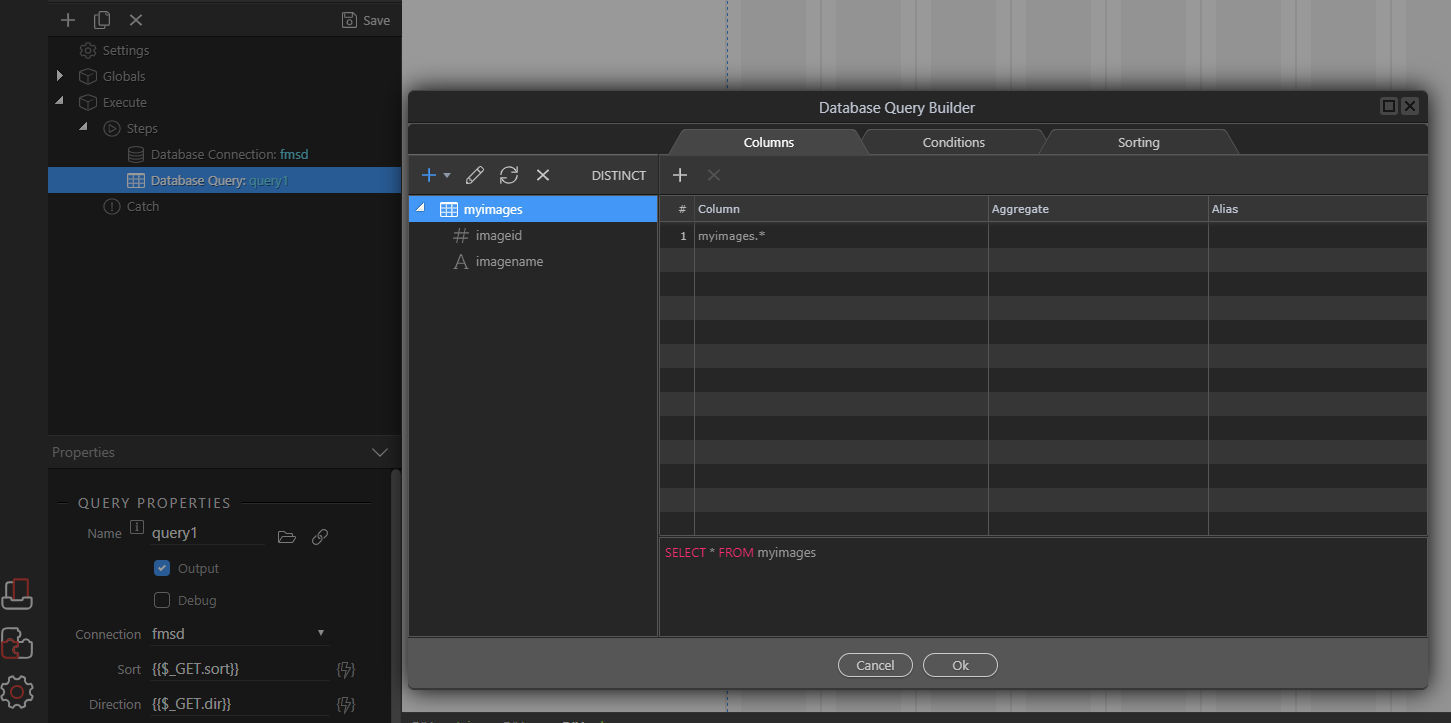
Then a query to retrieve all the image data
Don’t forget to save it, i called this getimages
Now in app connect make a Server Connection to that server action, i called this conn_getimages
Now use generator to create a bootstrap table based on that server action
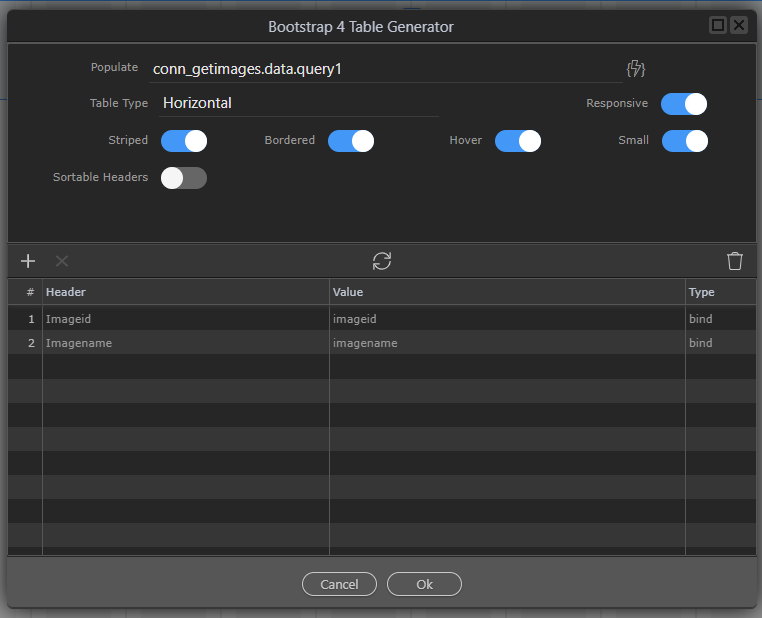
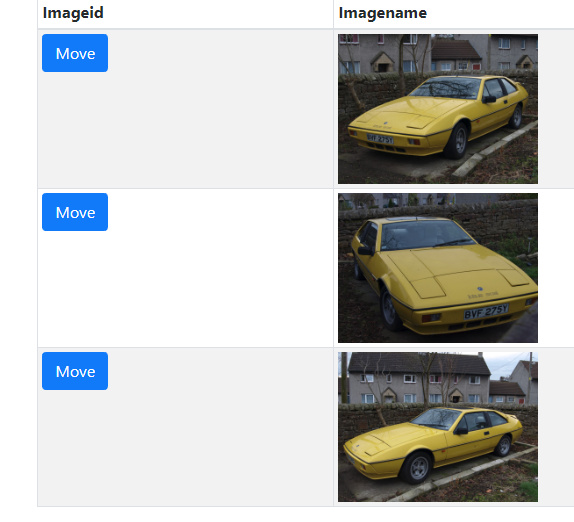
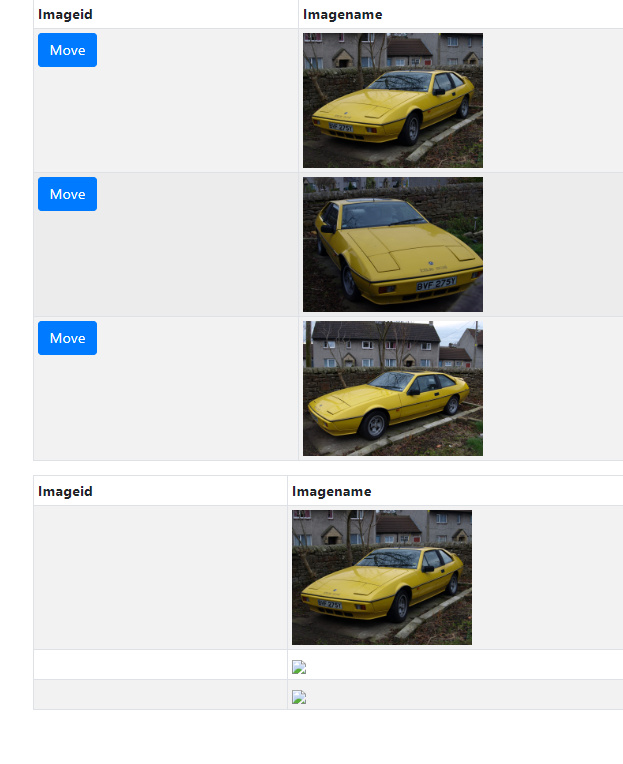
The output should be:

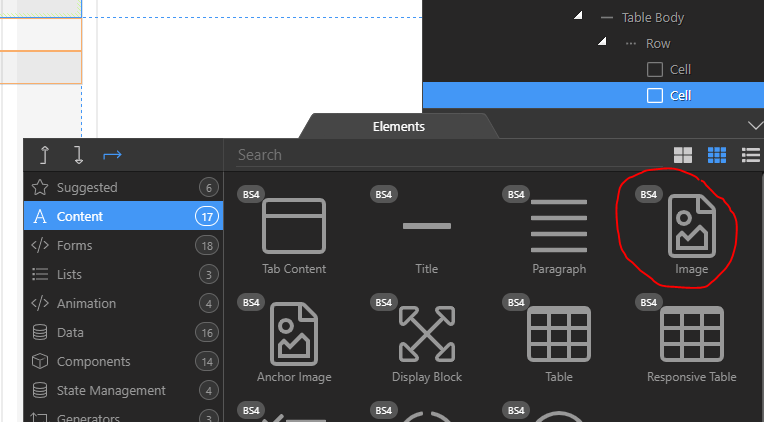
Now let us change the text of the image name to an actual image
Click on the cell containing the image name and insert an image inside it
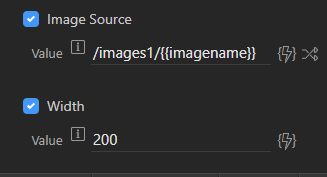
Now go to the Dynamic Attributes of the image and select image source
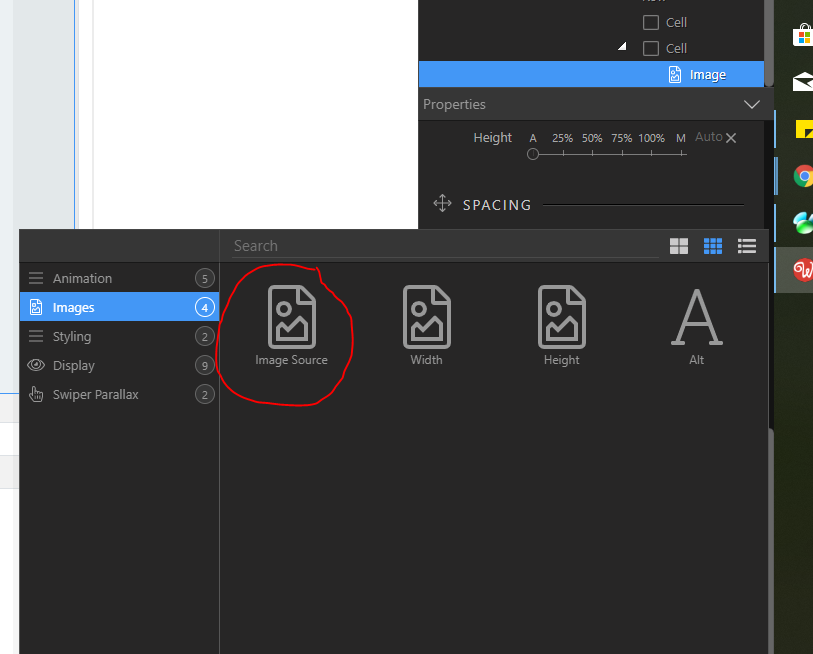
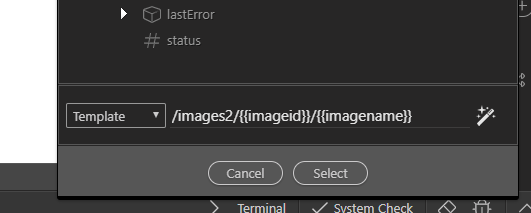
Select the data picker, switch to template and add the path then the imagename.
Be sure to select the imagename from the repeat region, NOT the server connection
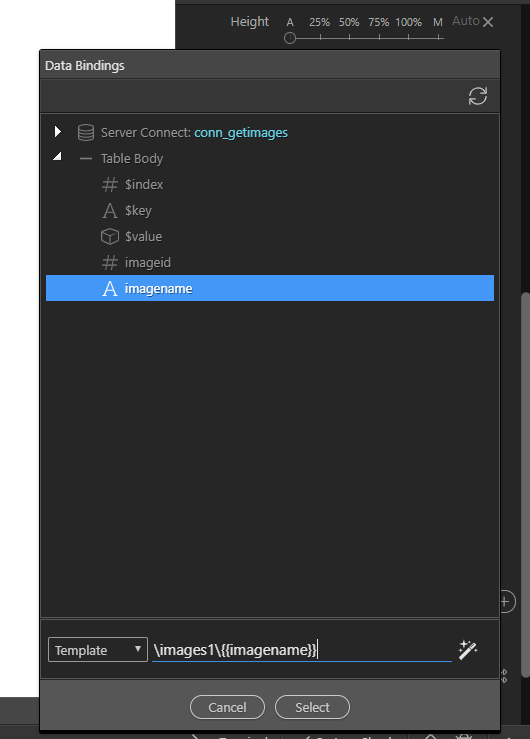
Click Select
Lastly click the containing cell and uncheck the inner text entry
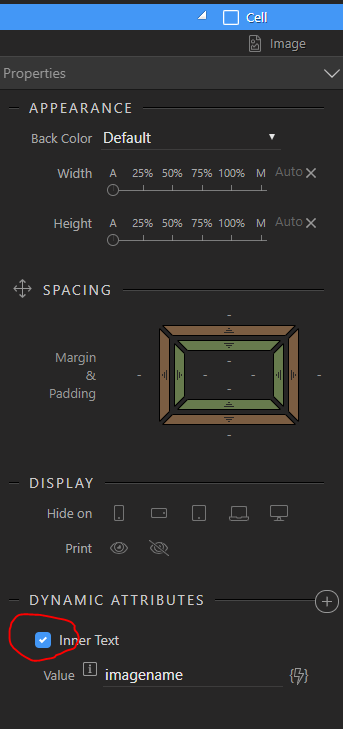
You may need to limit the image size, to do so select dynamic Properties of the image and set the max height or width. I use 200pixels width
You will now see the images on screen

Now we need a move button. We will send parameter via POST to allow additional parameters to be sent if required.but an anchor button or link and GET parameter would suffice in simple cases
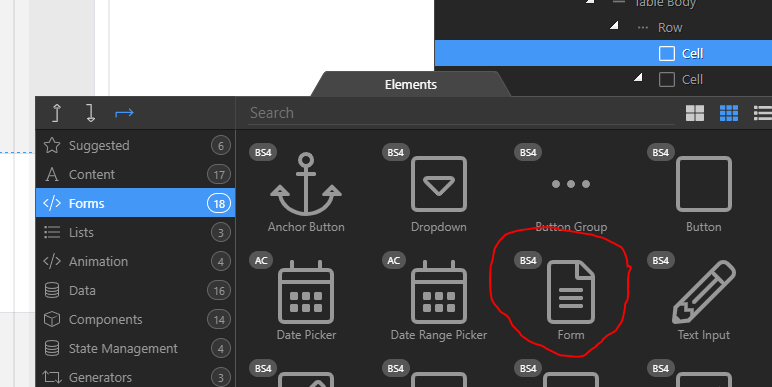
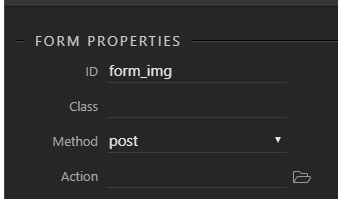
Select the first table cell and insert a form inside, i will call form_img and set it’s method to post
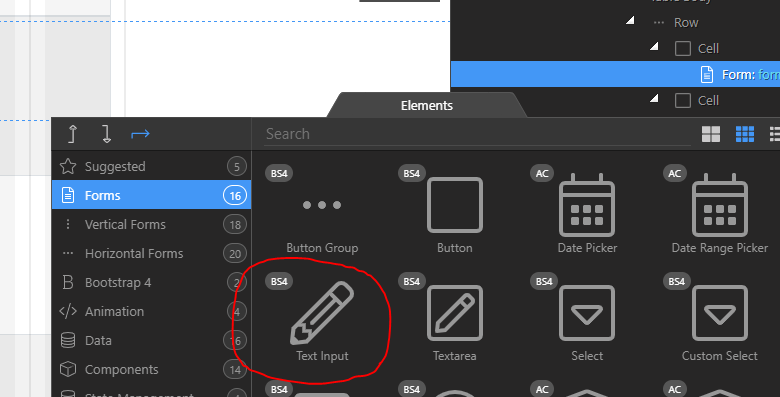
Inside the form add a text input
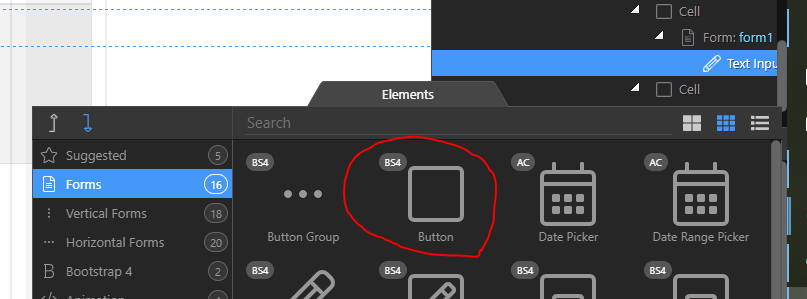
and a button
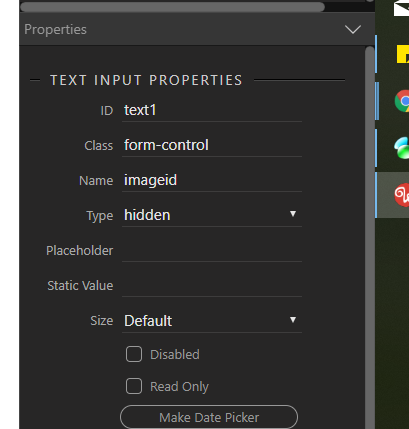
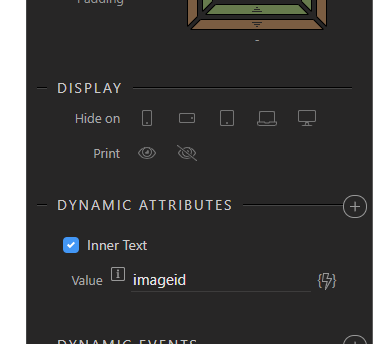
Give the text input a name, i use imageid to match the table column we will be querying on and make that input hidden
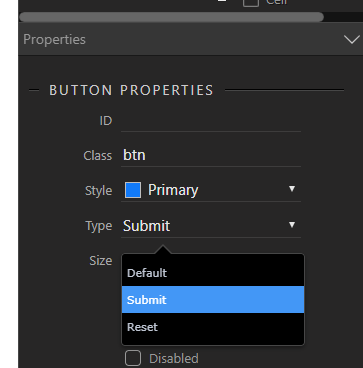
Lastly colour the button to your taste and make it a submit button
Again don’t forget to remove the parent cell’s inner text setting by unticking the check box
Lastly click the button and change it’s title to “Move”
Save ther page!
Now we need the server action which will move the file
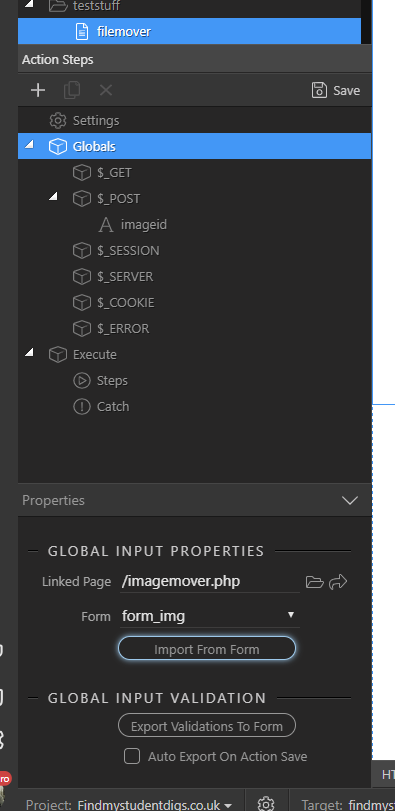
Ctreatye a new server action, i will call it filemover
In globals browse to your page and select the form you have just created. Click Import from Form to get the parameters from the form, in this case imageid
We will now copy the file from the folder images1 to to a second folder /images2/ and within that a sub folder corresponding to the imageid i.e. /images2/{{imageid}}
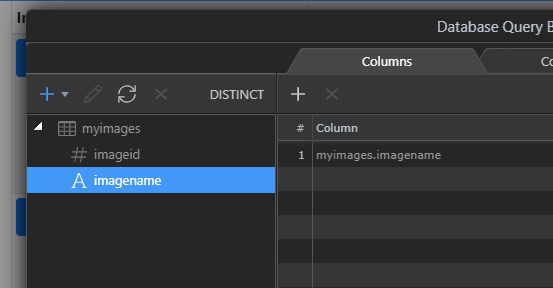
Firstly we need the image name
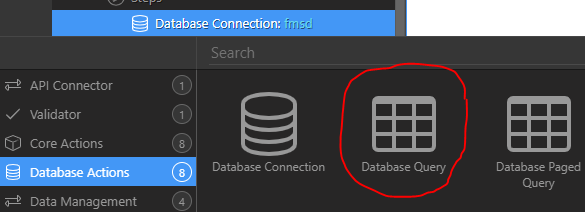
Add a database connection
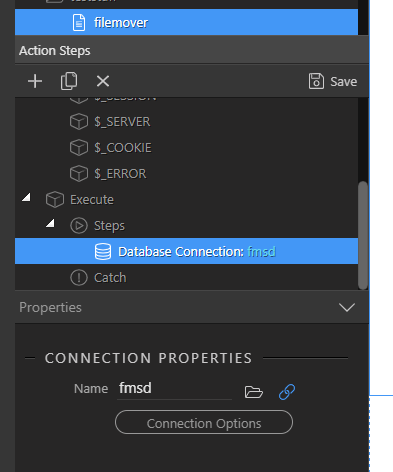
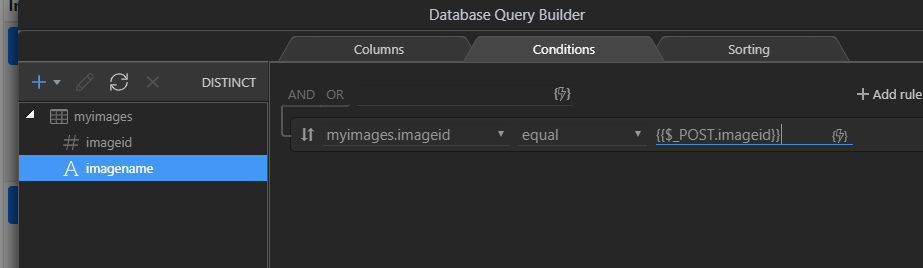
Then a database query to retrieve the image name from the imageid passed from the form
filtered on the imageid sent from the form
Save your server action
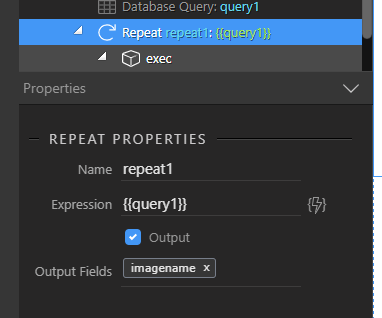
Add a new step, Core Actions => Repeat
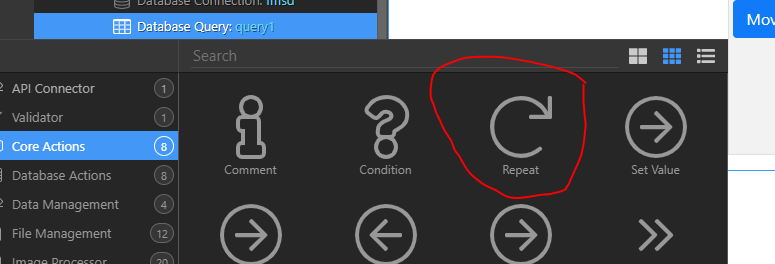
and set it’s expression to the results of the query and output the imagename field
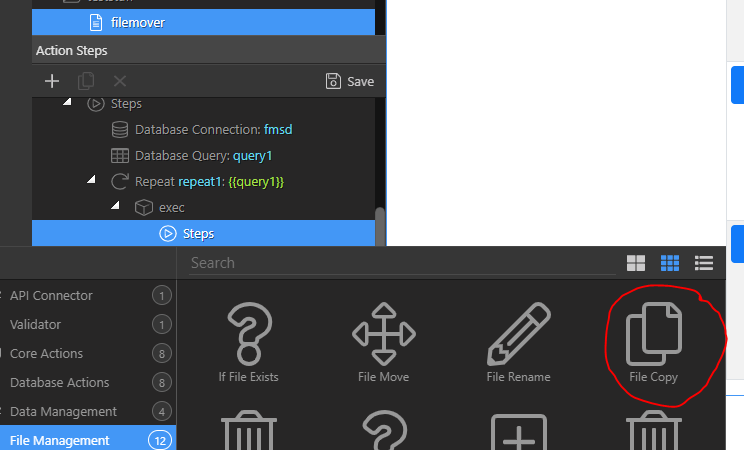
Now we add the file move within the repeat
In the server action add a new step, File Management -> File Copy
In the File Path set the original file’s folder and the imagename returned by the server action as shown in the repeat
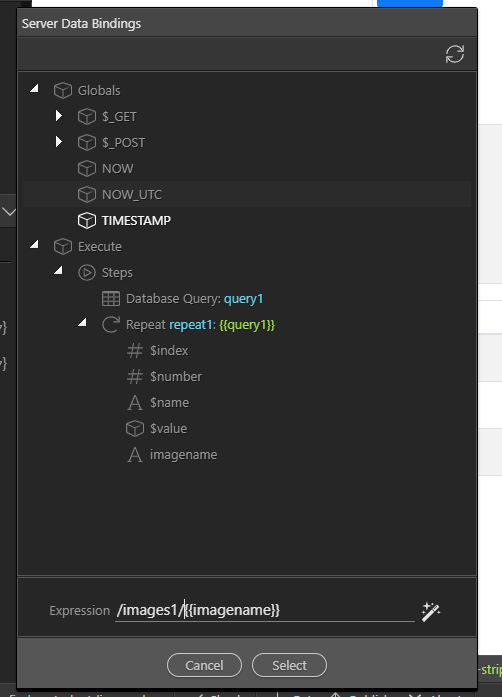
Now set the destination path, in this case it will be images2 followed by the imageid. It will be given the same filename
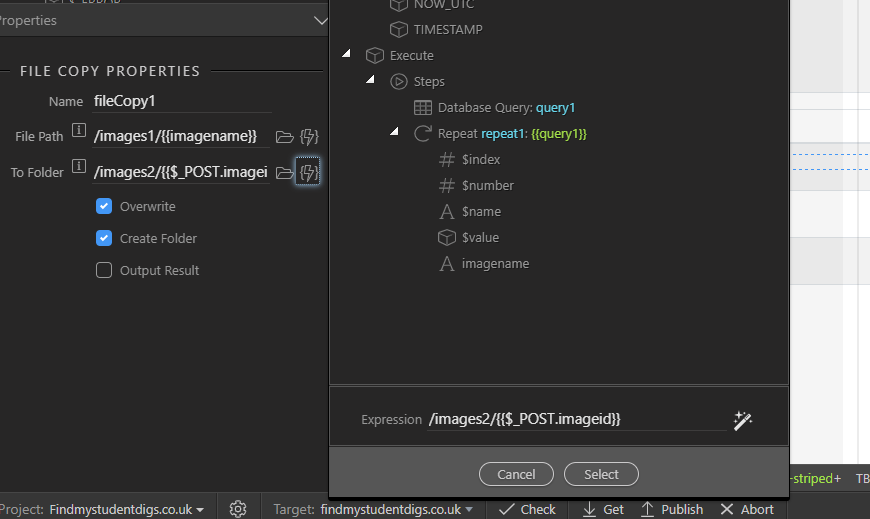
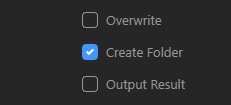
Ensure you check “Create Folder”
Click OK and Save the server Action
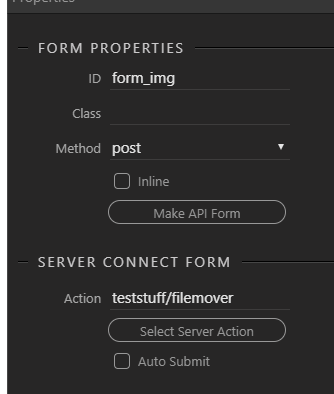
We now go back to the app connect page and select the form we called form_img and set it to a server connect form and link it to the new server action.
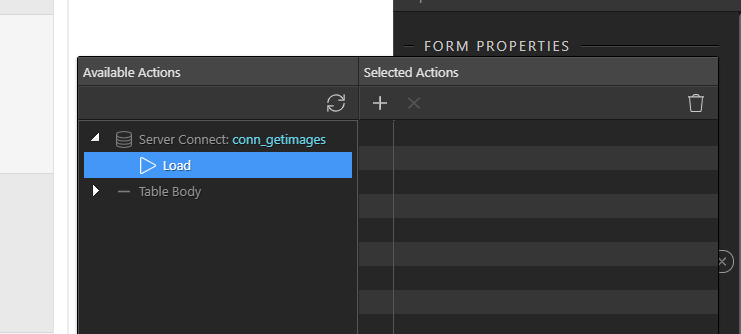
lastly let us set a dynamic event for the form based on the success event.
Select Dynamic Events for the form => Server Connect => Success
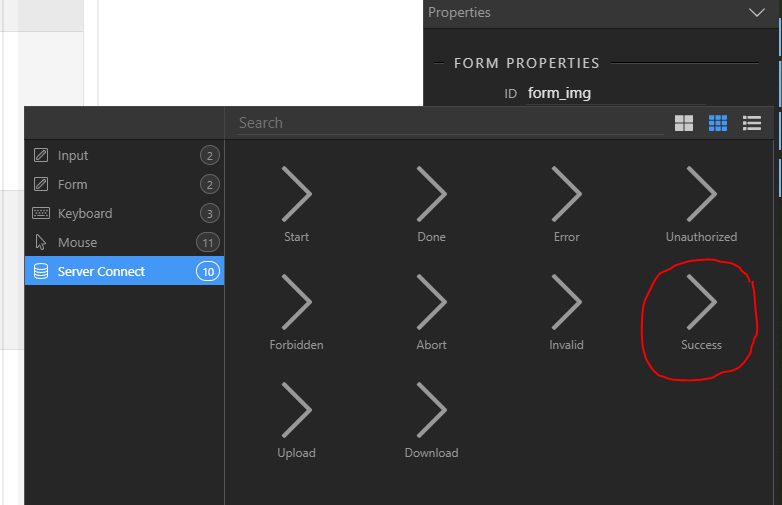
Click the picker

and select the server connection load event
Now we will add a second table to show the results.
Select the first container and click duplicate (it’s just a quick way of adding a second almost identical table)
Now scroll down to the image component in this duplicated container and change the path to:
/images2/{{imageid}}/{{imagename}}
Now remove the buttons from the second container form (as we would now want to move the moved file!)
The new table will correctly show a broken image icon as these images do not yet exist
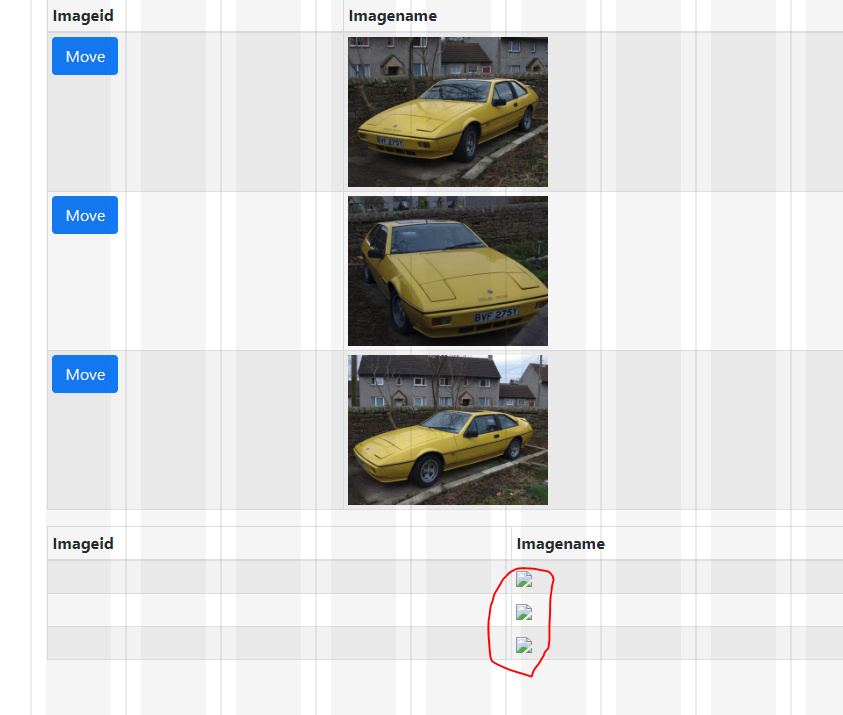
Open the page in your preferred browser

Click a move button, pause for a second or two for the image to be moved on the server and then refresh
The image has been copied to the new location and will show in lower table
Last updated: