If you have not read Part 2, please go here and read it first.
In the latest Wappler update we have added the final piece in the Docker integration - Docker Remote Deploy!
Now you can not only fully develop locally with Docker but also deploy to any remote Docker host!
Development and Deploy has never been easier!
Docker Remote Hosts are the machines on your hosting or cloud that you will be deploying your production solutions.
How it works
To be able to deploy to remote hosts, you just have to define them as separate targets in the Wappler Project Settings.
After that you can easily switch to the target and deploy to you with a single click!
Let see how this works
Defining a Remote Docker Target
Defining a Remote Docker Target is works exactly as any other docker target, but you just need to select that the connection type is “remote” instead of local (1) and then enter the Docker Remote settings (2)
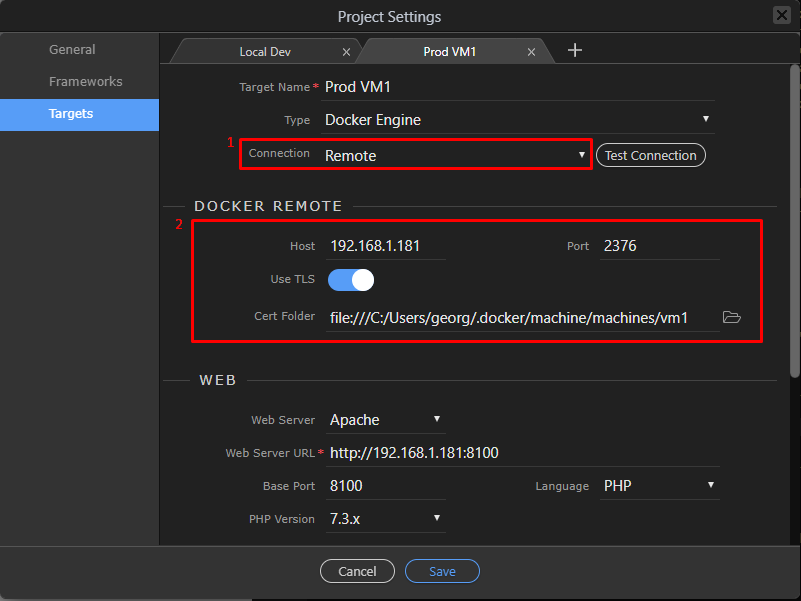
Next to the required host IP or name, you can choose to use a secure connection by choosing Use TLS. That is of course the way to go for production hosts as all deploy have to be fully secured.
To be able to connect to such secured host you will need to have the right SSH keys
Follow the Docker guide how to generate those on your remote server.
At the end you will have 3 required files ca.pen, cert.pem and key.pem that are generated and you will have them in a folder that you can choose as “Cert Folder”
If you have a local docker machine as remote you can choose the docker machine folder, see at the end of this guide how to create one.
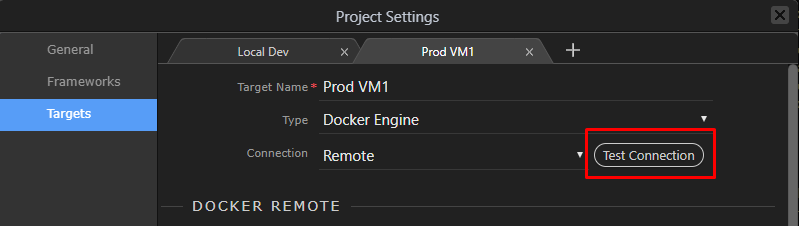
Performing a Connection Test
After you have entered all your your remote info and you can do a connection test, to see if it all works fine. Just click on the “Test Connection” button:
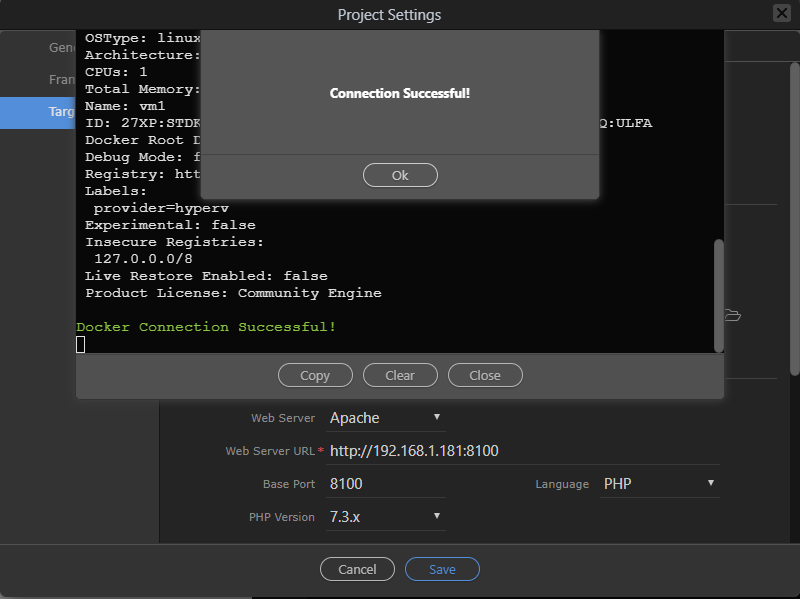
This will open a popup dialog and try to connect to your remote host. If your remote host is running and the docker engine on it is running and responding, you will see a success message.
Common Connection Errors
Here are some common errors that might occur.
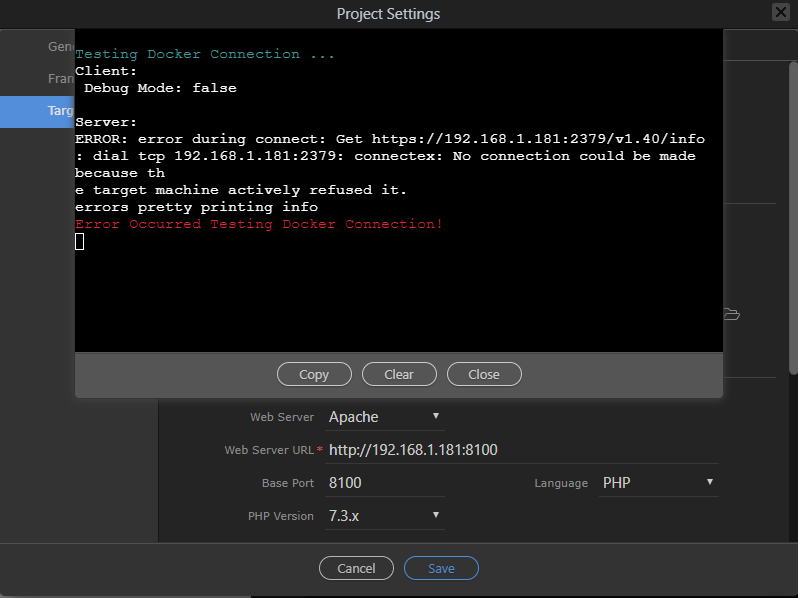
Bad Host
If for example your host is offline, responding or you got bad host name, you will see:
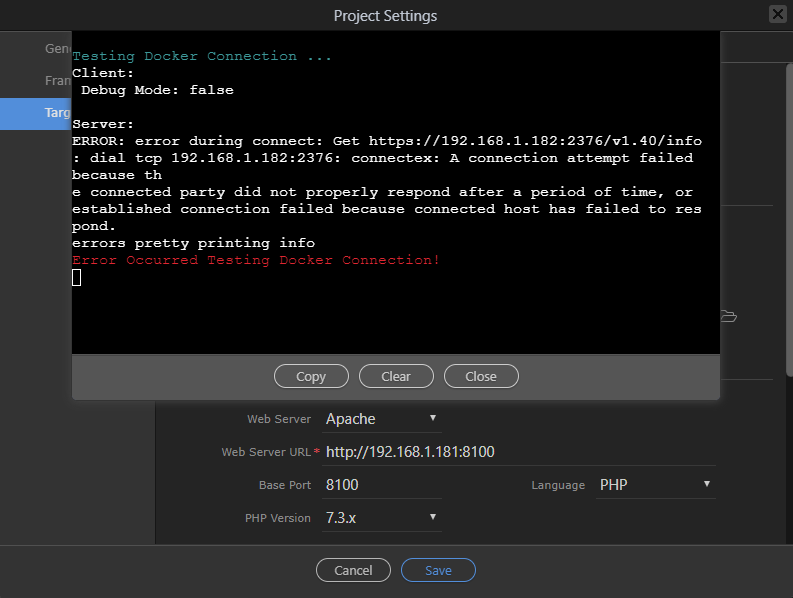
Wrong Port
If you got a wrong docker port:
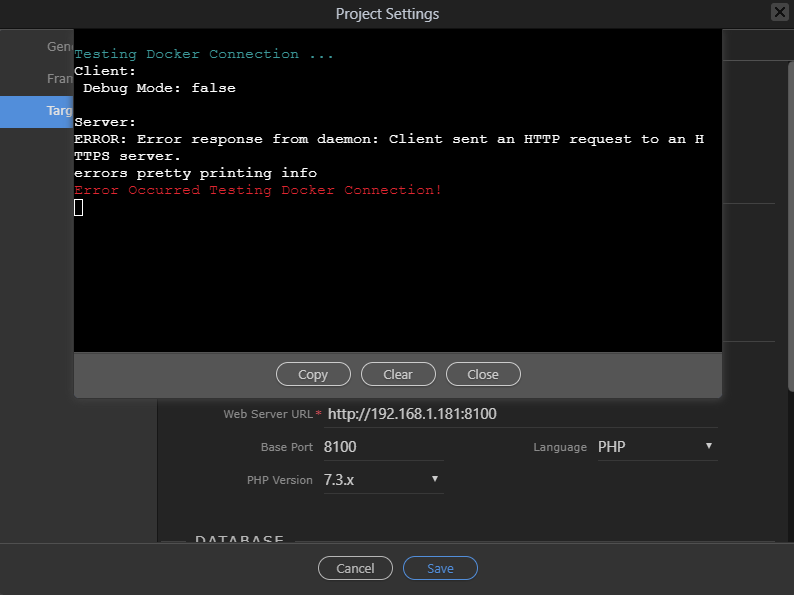
Security Required
If you try to connect without security, but security is required:
Deploying your Wappler Project to Remote
Deploying your project to the Remote Docker host is really easy. Just click on the Deploy button in the docker toolbar.

The deploy process will kicks in, if you are interested to see what is happening you can expand the panel below
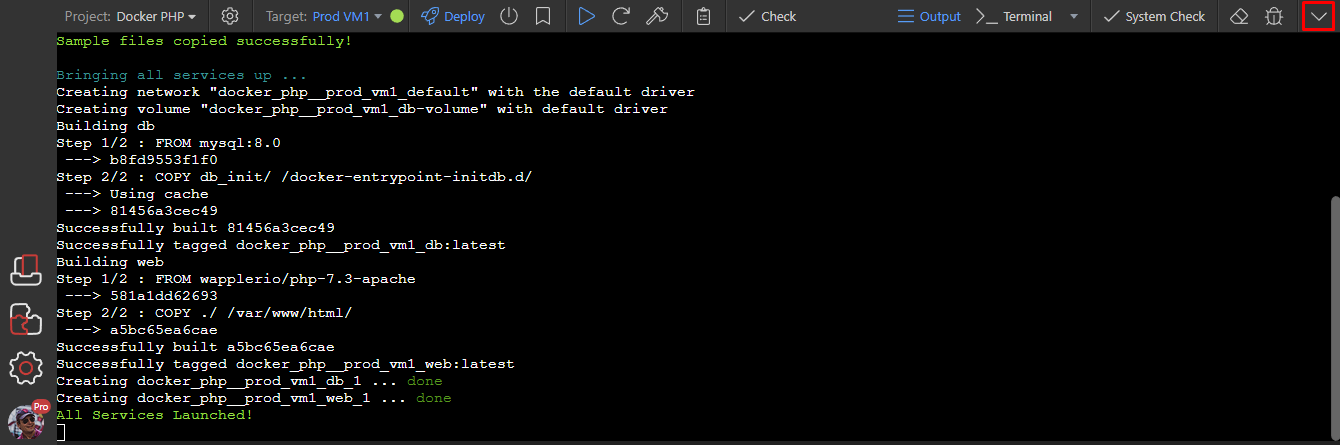
You will see that images are being downloaded and installed on the remote host and also your project files are copied.
If everything goes well you will see that all services are running now.
The green status indicator is now on and also the deploy icon next to the play icon are blue.
![]()
Updating and Redeploy your Wappler Project
After a while you will probably make some changes to your project and you need to redeploy new version. This is also very easy. Just click on the Deploy button again!

This will update your remote services with the new local files that you have and restart them.
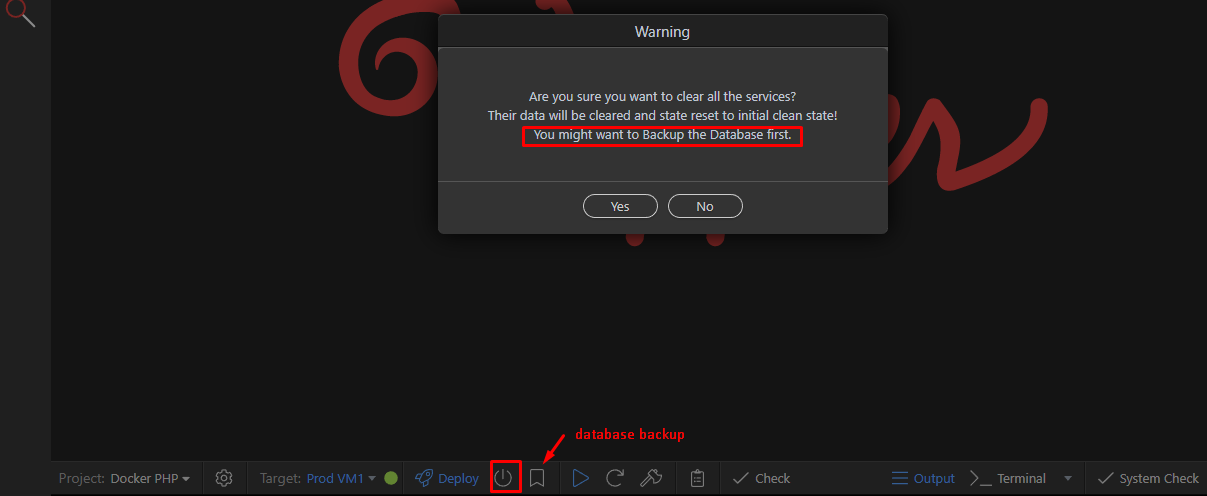
Clearing Remote Host
If you want to wipe a remote host clean and do a fresh redeploy, you just have to click on the “shutdown” icon. Do note that any databases on it will be cleaned as well so make sure you have created a backup of their data structure first that will be used for the initial population.
Local Docker Machines for testing / staging
NOTE: The following is a manual procedure, which was later automated and made much more easier to use in Wappler, see:
Some times you need a full Docker machine running but not necessary remote, but just as a local machine for testing or staging environment.
Such local Docker Machine is installed as a virtual machine and behaves exactly as a remote docker host.
Local Docker Machines on Windows
To create a local docker machine on Windows you will be used the Windows 10 Hyper-V that Docker already uses.
You must have a Virtual Switch created first in the Hyper-V Manager, so make sure you follow the instructions to create Virtual Switch first
Then just open a terminal and enter the following command:
docker-machine create --driver hyperv vm1
where vm1 is the name of your virtual machine.
This will kicks in a whole process that will download a special linux image with docker on it, install it, configure docker engine on it and produce you the needed SSH keys.
When it is done, you can check the status with:
docker-machine ls
![]()
You will see that status of your machine and also its IP address and port that you can use for connecting to it in Wappler.
There are also other docker-machine commands like stop/start or rm (remove) that you can use to manage its status later on.
So now you can enter the connection info in Wappler:
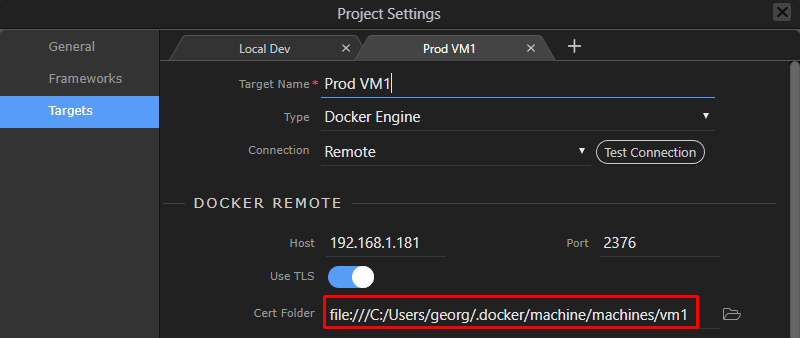
Do note that all Docker machines configuration info, includes its keys are stored in
C:\Users\username\.docker\machine\machines in the machine name (vm1 in our case) as sub folder.
So you have to choose this folder for as cert folder.
Local Docker Machines on Mac
Installing a local docker machine on Mac is a bit difficult than Windows because you have two choices to install your virtual machine there.
You can either use virtualbox from Oracle or use the much better native hyperkit driver.
Docker describes the virtualbox only in their docs, but hyperkit can be better installed.
Install Hyperkit driver
The required hyperkit driver can be easily installed with brew so make sure you go that first.
Then in a terminal enter:
brew docker-machine-driver-hyperkit
Follow the instructions and also perform the two sudo commands at the end to give permissions.
After the hyperkit driver is instaleld you can create the docker machine with:
docker-machine create --driver hyperkit vm1
where vm1 is the name of your virtual machine.
This will kicks in a whole process that will download a special linux image with docker on it, install it, configure docker engine on it and produce you the needed SSH keys.
If the hyperkit driver doesn’t work for you, you can always follow the docker instruction about using the virtualbox
When it is done, you can check the status with:
docker-machine ls
You will see that status of your machine and also its IP address and port that you can use for connecting to it in Wappler.
There are also other docker-machine commands like stop/start or rm (remove) that you can use to manage its status later on.
So now you can enter the connection info in Wappler:
Do note that all Docker machines configuration info, includes its keys are stored in
\Users\username\.docker\machine\machines in the machine name (vm1 in our case) as sub folder.
So you have to choose this folder for as cert folder.
Conclusion
So that is all about remote deployment with Docker. Power all those docker hosts and deploy at wish!
Do supply us with feedback about the process and if everything is clear and easy to use.
Continue to read Part 4 of the full Docker tutorial.
Last updated: