Hey everyone,
I’m just writing this short tutorial to show you that you can use a third-party wysiwyg editor in your projects.
Depending on your projects, as it’s not officially integrated into Wappler I guess it could be restrictive, but for pretty simple use case, it will be perfect.
First of all, why?
Yes, Summernote is already great, but I don’t really like how it works, and the custom plugins are sometime a little buggy, and it’s not that easy to include them…
Why Tiny Cloud?
Because it’s very popular, powerful, and you can really easily integrate it in your projects. (Bootstrap ready)
How much does it cost?
There is a free version which will be perfect for most of the project.
Is there a demo to check it out?
Sure, here you go: https://www.tiny.cloud/docs/demo/full-featured/
Let’s go!
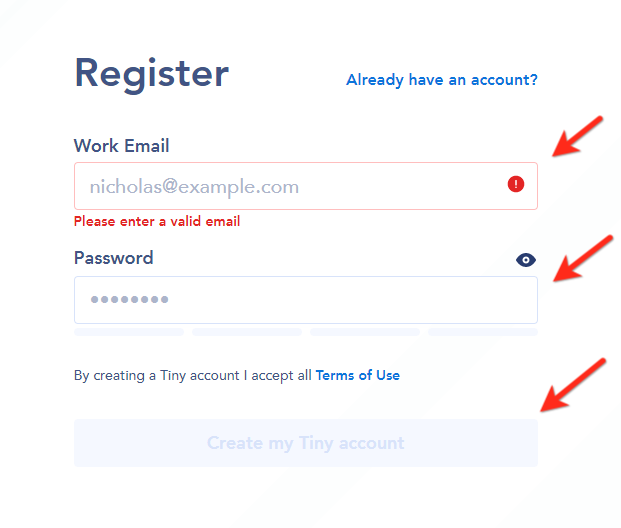
- Create a free account in their website: https://www.tiny.cloud/auth/signup/
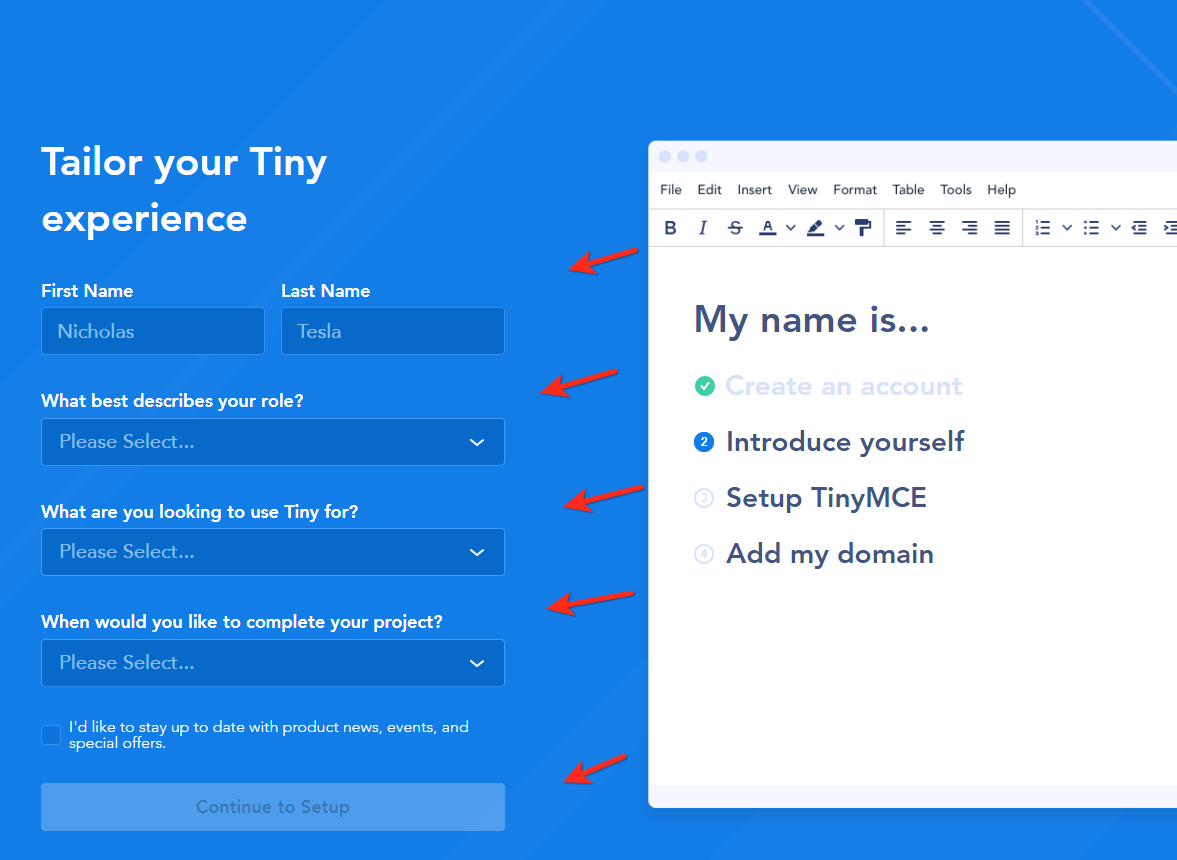
- Basically, from now, you just need to follow the simple steps on their website. So the next step is about giving your personal informations.
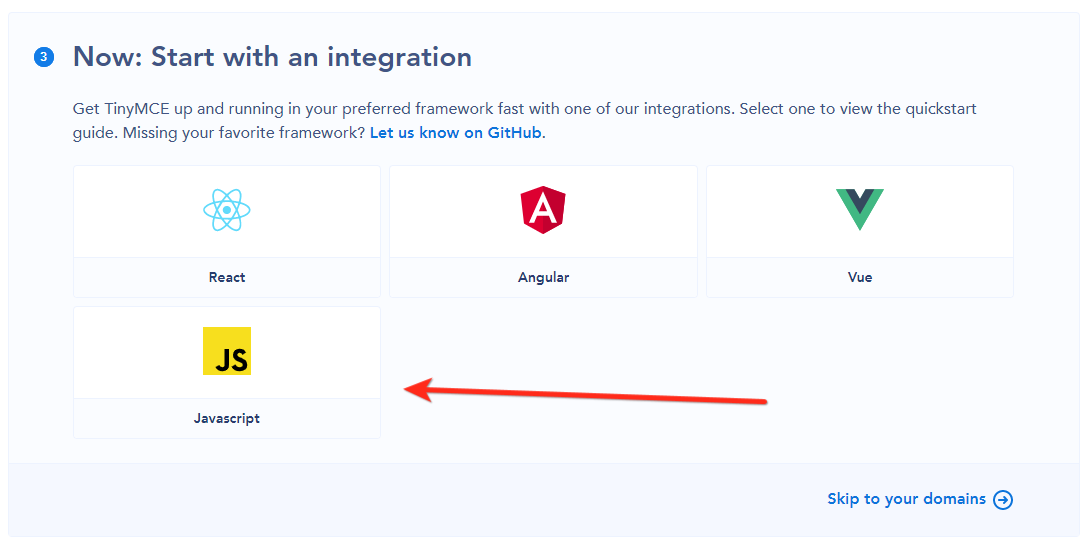
- You need to choose “Javascript” to get the right integration details.
- You’ll now see the integration details like below:
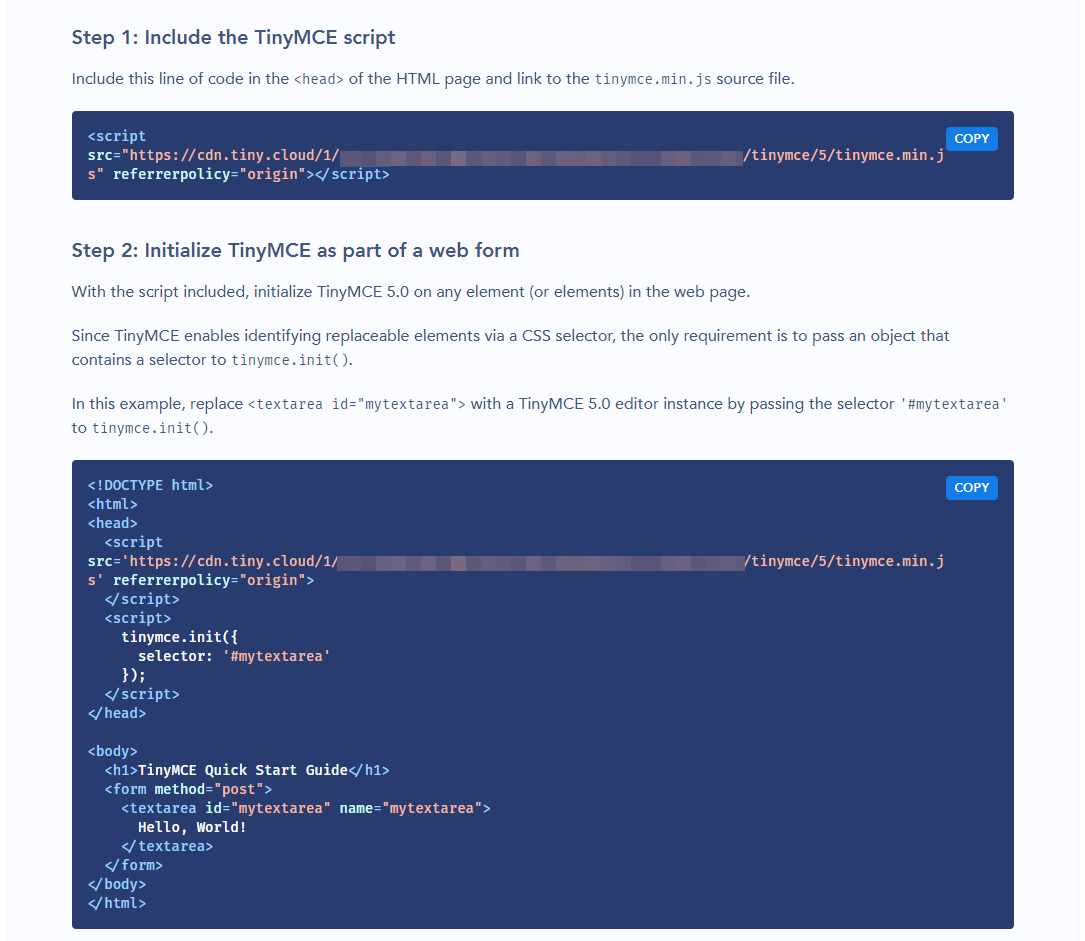
- Now, you must include the TinyMCE script on your website.
You can just include the script in the concerned page or if you use partials (with PHP) or layouts (with NodeJS), you can add it there, between the head tags like below in a NodeJS layout:

- The new Tiny editor will be charged but we need to initialize it and add some features (more buttons in the editor).
I assume you already know how to create a form and post datas. So your page already has the form with a textarea like below:
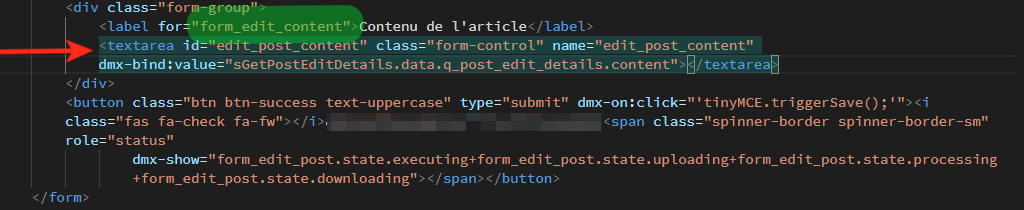
As you can see, I’ve added this ID and Name to this textarea: form_edit_content
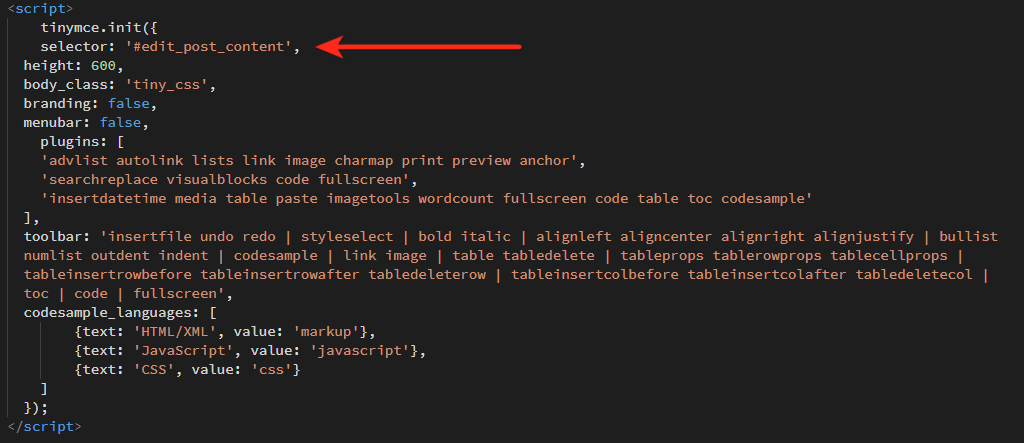
Now we’ll finish the integration by adding the last code snippets they provided to us and replace the default ID (#mytextarea) by our own ID (#form_edit_content):
You can now save everything and check your page to see if the TinyMCE editor is showing. 
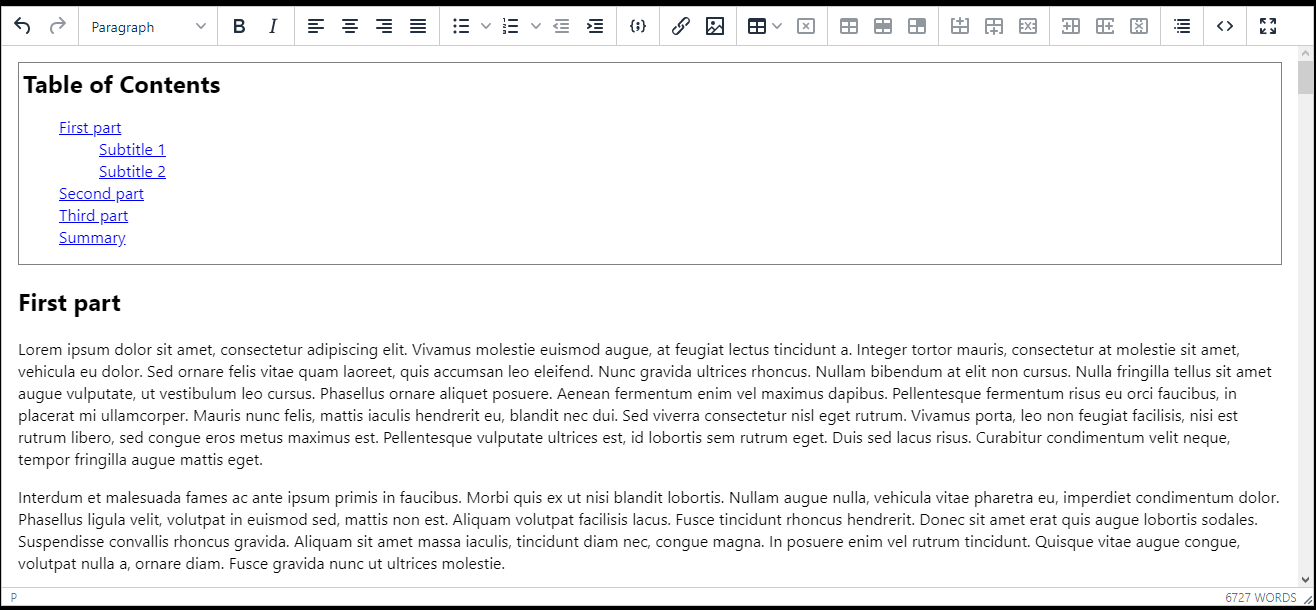
As you’ve certainly noticed my code is bigger than the default one provided by TinyMCE, it’s because I’ve customized my editor to include some of their plugins:
- TOC: Automatically create a Table of Content
- Table: Add tables in your posts
- Fullscreen: Write your post in full screen without distractions
- Image: Add your images in your posts
- Code Sample: Use a code Highlighter in your posts (Need to include separate files for PrismJS)
- Code: View/edit source of your post
I also added a line to change the editor height to 600px, remove the menubar and remove the branding in the bottom right.
If you want to use the same configuration as me, here is the code (don’t forget to change the selector ID)
<script>
    tinymce.init({
    selector: '#edit_post_content',
  height: 600,
  body_class: 'tiny_css',
  branding: false,
  menubar: false,
    plugins: [
    'advlist autolink lists link image charmap print preview anchor',
    'searchreplace visualblocks code fullscreen',
    'insertdatetime media table paste imagetools wordcount fullscreen code table toc codesample'
  ],
  toolbar: 'insertfile undo redo | styleselect | bold italic | alignleft aligncenter alignright alignjustify | bullist numlist outdent indent | codesample | link image | table tabledelete | tableprops tablerowprops tablecellprops | tableinsertrowbefore tableinsertrowafter tabledeleterow | tableinsertcolbefore tableinsertcolafter tabledeletecol | toc | code | fullscreen',
  codesample_languages: [
        {text: 'HTML/XML', value: 'markup'},
        {text: 'JavaScript', value: 'javascript'},
        {text: 'CSS', value: 'css'}
    ]
  });
</script>
- And now, before using it live, just one last thing you need to add to your form to be sure every data in your editor is posted by your form in your database: Save the TinyMCE data on submit.
If you don’t do that, you’ll likely see that your text is not saved/updated in your database.
To do so, you need to add this to you submit button: tinyMCE.triggerSave();.
You can add it in the Codeview directly (1) or in the Property Editor (2).

Annnnd, you’re done! 
I made a small gif to show how it’s working (too big to upload here directly): https://jumpshare.com/v/Kfdl6sHRzOtM0b3JYS5A
I hope you’ll enjoy this tutorial and find it useful. 
Last updated: